Introduction
The photos on your website tell visitors who you are before they read a single word. In an instant, images communicate whether your business is professional, trustworthy, and right for them. For local businesses in Western Sydney, authentic photography is one of the most powerful tools for connecting with your community.
Yet many business websites rely on generic stock photos that could represent any business anywhere. When a Hills District customer lands on your page and sees the same corporate stock imagery they have seen on dozens of other sites, something feels off. They might not consciously recognise why, but trust is harder to build.
This guide covers everything Western Sydney business owners need to know about getting the right images for their websites—whether you are shooting them yourself or hiring a professional.
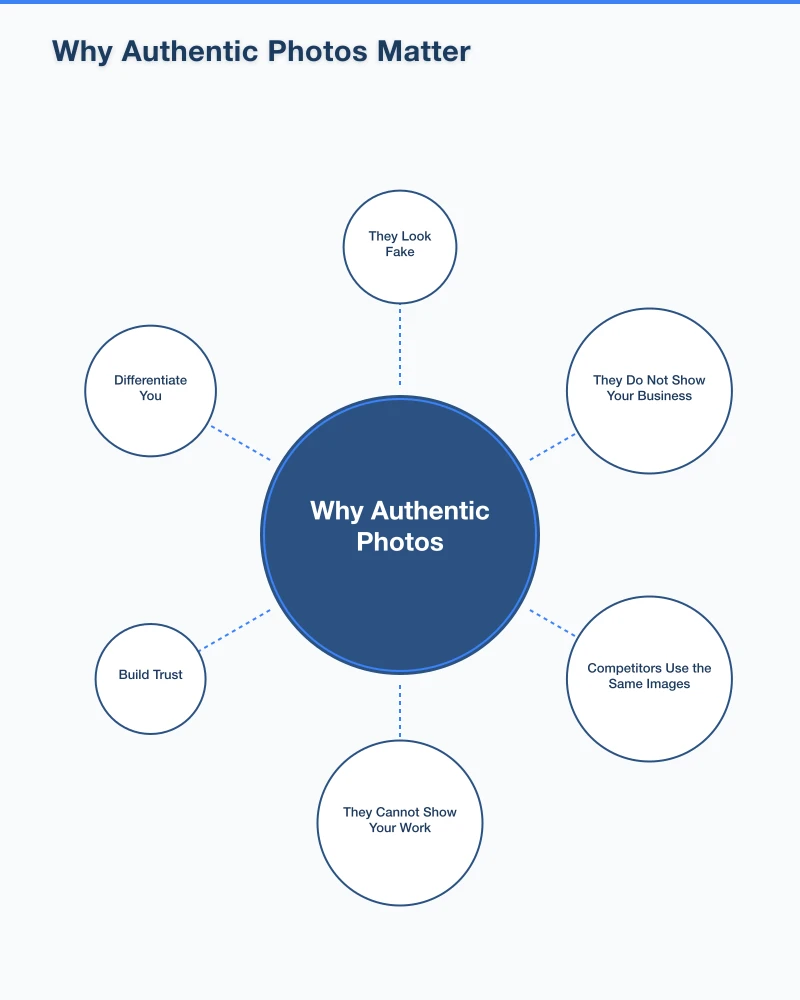
Why Authentic Photos Matter
The Stock Photo Problem
Stock photos have their place, but overreliance creates problems:
They Look Fake: Customers have developed stock photo blindness. Overly polished images with diverse groups of models in unrealistic settings immediately signal “generic business.”
They Do Not Show Your Business: A stock photo of a smiling person at a computer tells visitors nothing about your actual team, workspace, or services.
Competitors Use the Same Images: We have seen the same stock photos appear on competing Western Sydney businesses—not a good look for either.
They Cannot Show Your Work: For service businesses especially, potential customers want to see your actual work, not someone else’s.
What Authentic Photos Achieve
Real photos of your business:
Build Trust: Visitors see actual people, places, and work. This transparency builds confidence.
Differentiate You: Your photos are unique. No competitor can have the same images.
Show Personality: The little details in real photos communicate your business culture and approach.
Demonstrate Competence: For trades and service businesses, photos of completed work are powerful proof of quality.
Connect Locally: Photos showing recognisable Western Sydney locations and contexts resonate with local customers.
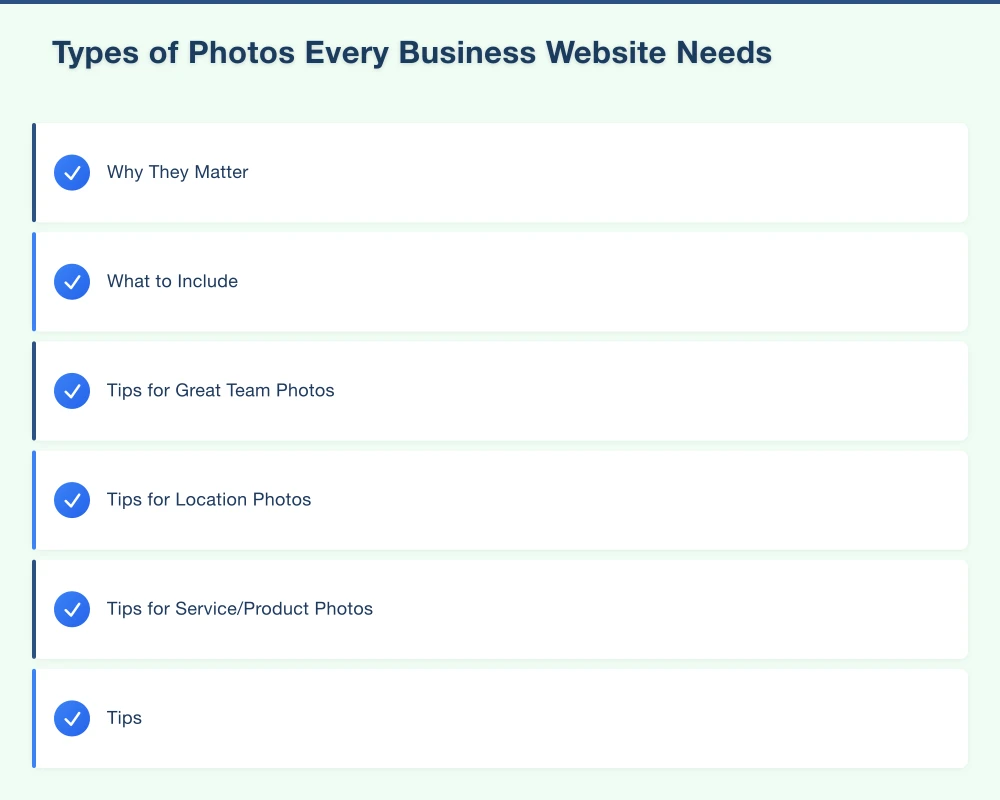
Types of Photos Every Business Website Needs
Team and People Photos
Why They Matter: People buy from people. Showing your team humanises your business and builds connection.
What to Include:
- Individual headshots for key team members
- Candid shots of the team working together
- Action shots showing your team serving customers
Tips for Great Team Photos:
- Natural expressions beat forced smiles
- Consistent style across all headshots
- Show people in their work environment
- Capture real interactions, not posed handshakes
Your Workspace and Location
Why They Matter: For businesses with a physical location, photos help customers know what to expect when they arrive.
What to Include:
- Exterior of your building (helps people find you)
- Interior spaces where customers visit
- Your workshop, office, or behind-the-scenes areas
- Details that show personality (signage, decor, equipment)
Tips for Location Photos:
- Shoot during the day with good natural light
- Declutter before photographing
- Include shots from customer perspective (what they see walking in)
- Capture the atmosphere, not just the space
Products and Services in Action
Why They Matter: Show what you do, not just describe it. This is especially important for service businesses.
What to Include:
- Before and after shots (transformations)
- Work in progress images
- Finished projects
- Products displayed attractively
Tips for Service/Product Photos:
- Get customer permission for any photos of their property
- Document your work routinely, not just for exceptional projects
- Show scale and context (a wide shot and a detail shot)
- Capture the problem being solved, not just the finished result
Customer Interaction Photos
Why They Matter: These demonstrate your service in action and help potential customers visualise themselves working with you.
What to Include:
- Consultations and discussions
- Service delivery moments
- Handovers and completions
- Happy customers (with permission)
Tips:
- Always get explicit permission before using customer images
- Candid moments often work better than posed shots
- Focus on genuine interactions
DIY Photography Tips
You do not need professional equipment to get usable photos for your website. Modern smartphones are remarkably capable.
Equipment Basics
Smartphone Photography:
- Use your phone’s best camera (usually the main lens, not ultrawide)
- Clean the lens before shooting (seriously, check it)
- Use portrait mode for people shots
- Avoid digital zoom—move closer instead
Helpful Accessories:
- A simple tripod or phone mount for stability
- Ring light for consistent indoor lighting
- Reflector (or white foam board) to fill shadows
Lighting Fundamentals
Lighting is the single biggest factor in photo quality.
Natural Light Is Best:
- Shoot near windows during the day
- Avoid direct harsh sunlight (creates hard shadows)
- Overcast days provide soft, flattering light
- Face your subject toward the light source, not away
Indoor Lighting Tips:
- Turn off mixed light sources (avoid combining fluorescent and natural light)
- Add extra lights to reduce shadows
- Avoid shooting with bright windows behind your subject
When to Shoot:
- For outdoor photos: early morning or late afternoon
- Avoid midday harsh sun
- Cloudy days are often better than sunny days
Composition Basics
The Rule of Thirds: Mentally divide your frame into a 3x3 grid. Place key elements along these lines or at intersections, not dead centre.
Leave Space: Do not crowd the frame. Leave room around your subject.
Consider Background: What is behind your subject? Remove distractions.
Vary Your Angles: Do not shoot everything from eye level. Try higher or lower perspectives.
Get Close: Most amateur photos are taken from too far away. Move in.
Common Mistakes to Avoid
Poor Lighting: Dark, shadowy photos look unprofessional. Add light.
Cluttered Backgrounds: Clear away distractions before shooting.
Unflattering Angles: Avoid shooting up at people (nostrils are not a good look).
Over-Editing: Resist the urge to apply heavy filters. Keep edits subtle.
Inconsistent Style: A mix of wildly different photo styles looks chaotic on your website.
Hiring a Professional Photographer
While DIY can work for many needs, professional photography is sometimes worth the investment.
When to Hire a Professional
Consider professional photography for:
- Team headshots that will be used for years
- Major marketing campaigns
- High-end service businesses where image is critical
- When you genuinely cannot get acceptable results yourself
- Your business launch or major rebrand
DIY is usually fine for:
- Routine project documentation
- Social media content
- Quick updates to existing imagery
- Businesses in industries where polished perfection feels wrong (like trades)
Finding the Right Photographer
Look For:
- Portfolio showing work similar to what you need
- Experience with business/commercial photography
- Understanding of your industry
- Professional communication and clear process
- Local photographers who understand Western Sydney
Questions to Ask:
- What is included in your package (number of final images, editing)?
- What is your turnaround time?
- Who owns the final images?
- Can I see examples of similar work?
- What do you need from me to prepare?
What to Expect Cost-Wise
Professional photography prices vary widely, but typical ranges for Western Sydney in 2025:
Headshots: $150-400 per person, often with discounts for multiple team members.
Half-Day Shoot (4 hours): $600-1,500, covering various needs for a small business.
Full-Day Shoot: $1,000-3,000, comprehensive coverage including team, location, products, and action shots.
Per-Project/Per-Image: Some photographers charge per final delivered image rather than by time.
Preparing for a Professional Shoot
Before the Day:
- Clean and organise spaces to be photographed
- Confirm team members and schedule
- Prepare any products or equipment to be featured
- Communicate your vision and priorities to the photographer
- Review and approve any location access requirements
On the Day:
- Allow enough time (rushing shows in photos)
- Have someone available to make decisions
- Be open to the photographer’s suggestions
- Capture a shot list but remain flexible
Optimising Photos for Your Website
Great photos are useless if they slow your website to a crawl or display poorly.
File Size and Compression
Why It Matters: Large image files slow page loading. Slow pages hurt user experience and SEO.
Image Compression Tools:
- TinyPNG or TinyJPG (free online tools)
- Squoosh (Google’s free compression tool)
- ImageOptim (Mac app)
Target File Sizes:
- Hero images: Under 200KB
- Content images: Under 100KB
- Thumbnails: Under 50KB
Image Dimensions
Do not upload a 4000px wide image that displays at 400px. This wastes bandwidth.
Best Practice:
- Resize images to the largest size they will actually display
- For responsive sites, consider providing multiple sizes
- Most content images do not need to be wider than 1200-1600px
Image Formats
JPEG: Best for photographs with many colours and gradients.
PNG: Best for images with transparency or sharp text/logos.
WebP: Modern format with better compression. Use if your website supports it.
Alt Text and Accessibility
What Is Alt Text: Text description of an image, used by screen readers and displayed if images fail to load.
How to Write It:
- Describe what the image shows
- Keep it concise (under 125 characters)
- Include relevant keywords naturally, not stuffed
Example:
- Good: “Team meeting in our Parramatta office”
- Bad: “Image1.jpg”
- Overstuffed: “Best Parramatta accountant Western Sydney accounting services meeting”
Naming Files Properly
Before uploading, rename image files descriptively:
- Good: “cosmos-web-team-parramatta-office.jpg”
- Bad: “IMG_4532.jpg”
This helps with SEO and organisation.
Building an Image Library
Organising Your Photos
Create a system for storing and finding your business photos:
Folder Structure:
- Team Photos
- Completed Projects (organised by year or type)
- Location/Office
- Products
- Events
- Social Media
Naming Convention:
- Include date, subject, and brief description
- Example: “2025-06-blacktown-kitchen-renovation-completed.jpg”
Creating an Ongoing Process
Do not treat photography as a one-time project. Build it into your operations:
Routine Documentation:
- Photograph every significant project
- Update team photos when staff changes
- Capture seasonal variations of your location
Quick Capture Habits:
- Keep your phone ready for opportune moments
- Train team members to spot photo opportunities
- Store photos promptly rather than leaving them on phones
Regular Review:
- Quarterly, review your image library
- Archive outdated images
- Identify gaps to fill
Working with Customers
Photos of your work on customer property are invaluable but require care:
Always Get Permission:
- Ask before photographing
- Get written permission before publishing
- Be clear about how photos will be used
Make It Easy for Them:
- Offer to share photos with customers (they often appreciate it)
- Consider a simple permission clause in your service agreements
- Thank customers who allow you to feature their projects
Respect Privacy:
- Do not include identifiable personal items
- Be careful with property addresses
- Do not photograph customers without explicit consent
Image Ideas for Different Business Types
Trades and Home Services
- Before and after transformations
- Team on site in uniforms
- Your vehicle(s) with branding
- Tools and equipment
- Detailed shots of quality workmanship
Professional Services
- Team headshots (consistent style)
- Office environment
- Meeting and consultation scenes
- Local landmarks (showing your area)
- Abstract shots representing your services
Retail
- Product displays
- Store interior and exterior
- Staff helping customers
- New arrivals and seasonal displays
- Behind-the-scenes (receiving stock, setting up)
Food and Hospitality
- Signature dishes/drinks
- Kitchen action
- Dining spaces
- Team portraits
- Customer atmosphere (with permission)
Conclusion
The photos on your website are not just decoration—they are a critical communication tool. For local businesses in Western Sydney, authentic imagery builds the trust and connection that generic stock photos simply cannot achieve.
Whether you shoot photos yourself or hire a professional, the goal is the same: show potential customers who you really are. Your team, your workspace, your work, your personality. Real photos of real people doing real work.
Start with what you can do today. Even smartphone photos following basic principles are better than obviously fake stock imagery. Build your image library over time, documenting your work consistently. When budget allows or the occasion warrants, invest in professional photography for key images that will represent your business for years.
The businesses that succeed in connecting with local customers are those that present themselves authentically. Your photography is a major part of that presentation.
Need help showcasing your business online? Contact Cosmos Web Technologies to discuss how we can help with your website and digital presence.
Your website’s performance depends on what’s behind it. Cloud Geeks provides the managed hosting, cloud, and IT support that keeps Australian SMBs online and secure.
Ash Ganda covers how Australian SMBs are using AI, automation, and digital strategy to grow without scaling costs proportionally.
If your business is also planning a customer-facing iOS or Android app — Awesome Apps builds cross-platform mobile apps for Australian SMBs.
Part of the Ganda Tech Services family, Cosmos Web Tech delivers specialist web design and digital marketing for Australian small and medium businesses.